Imagine this condition: You do some data analytics stuff on Jupyter Notebook. You write a line of code, add a new cell, import pandas, read CSV, transform the values, then write 400 other cells before you get the result you want and save it as CSV.
A week later, you want to produce that very same result, but you completely forgot which piece of code you should run first, and which cell you should NOT run. You will also need to press enter 400-ish times before you get the result you are looking for, will take you like a half-day just to reproduce the result.
Also, imagine this: The input data which you need are being generated by someone else’s Jupyter Notebooks. You would need to ask them to generate the data first, which they need to run their error-prone notebooks. Another half-day wasted.
You might be wondering if there is a tool that makes your scripts reproducible, maintainable and modular; a tool that helps you to do separation of concerns and versioning; and a tool that helps you to deliver real-world ML applications; your life would be easier.
Enter Kedro
Creative output depends on creative input
Kedro is an open-source Python framework that makes it easy to build robust and scalable data pipelines by providing uniform project templates, data abstraction, configuration, and pipeline assembly. By using kedro, we write our data analytics/machine learning scripts with software engineering principles in mind.
We would need to do some installations & setups before we can use the Kedro framework. We are not going into details about how to install kedro, you can find it here.
To create a new kedro project, we can run kedro new on the CLI, then we need to input the project name, repository name, and python package name. Let us use bmi for all the names.
$ kedro new
Project Name:
=============
Please enter a human readable name for your new project.
Spaces and punctuation are allowed.
 [New Kedro Project]: bmi
Repository Name:
================
Please enter a directory name for your new project repository.
Alphanumeric characters, hyphens and underscores are allowed.
Lowercase is recommended.
 [new-kedro-project]: bmi
Python Package Name:
====================
Please enter a valid Python package name for your project package.
Alphanumeric characters and underscores are allowed.
Lowercase is recommended. Package name must start with a letter or underscore.
 [new_kedro_project]: bmi
Generate Example Pipeline:
==========================
Do you want to generate an example pipeline in your project?
Good for first-time users. (default=N)
 [y/N]: N
Change directory to the project generated in /home/user/bmi
This is how the kedro project usually structured:
bmi                     # Parent directory of the template
    ├── conf            # Project configuration files
    ├── data            # Local project data
    ├── docs            # Project documentation
    ├── logs            # Project output logs
    ├── notebooks       # Project related Jupyter notebooks
    ├── README.md       # Project README
    ├── setup.cfg       # Configuration options for `pytest`
    └── src             # Project source code
There are several important concepts in kedro, but we will be focusing on the 3 most important concepts: DataCatalog, Node, and Pipeline.
DataCatalog
DataCatalog is the registry of all data sources that the project can use. DataCatalog is a powerful concept. We can find all data sources & sinks in one place, as opposed to Jupyter Notebook or plain python script that the data definition is scattered everywhere.
The DataCatalog is stored in the yaml file named catalog.yml under conf/bmi/ folder. For example, if we have 3 CSVs as the data input/output, we can define all of them in one file:
freshman_bmi:
  type: pandas.CSVDataSet
  filepath: data/01_raw/weight_bmi.csv
  load_args:
    sep: ','
  save_args:
    index: False
    decimal: .

freshman_with_height:
  type: pandas.CSVDataSet
  filepath: data/02_primary/weight_bmi_height.csv
  load_args:
    sep: ','
  save_args:
    index: False
    decimal: .

freshman_bmi_summary:
  type: pandas.CSVDataSet
  filepath: data/03_summary/weight_bmi_height_summary.csv
  load_args:
    sep: ','
  save_args:
    index: False
    decimal: .
The topmost level of the yaml key is the catalog name (e.g freshman_bmi), this name will be used by Node later as a reference to the input/output data. We should also define the type and file path of the data.
In the example we use pandas.CSVDataSet type, but we can also use other types like SparkDataSet , pandas.ExcelDataSet , pandas.SQLQueryDataSet, and many more. You can find the completed DataSet type here.
We can also define the arguments for load/save, like which CSV separator we use, or whether we overwrite or append the file, and so on.
Node
Node in kedro is a python function wrapper that names the inputs and outputs of that function. We can link one Node to another by setting the output of one node as the input to another node.
For example, let us say we have 2 tasks which will:
- Calculate the height of a person based on the weight & BMI information, and save it to CSV
- Calculate the average weight, height, and BMI for each gender, and save it to CSV
We should first create a function for each of them:
import pandas as pd
import numpy as np


def calculate_height(df):
  df["height"] = np.sqrt(df["weight"] / df["bmi"])
  return df


def calculate_avg_by_gender(df):
  df = df.groupby('gender').mean()
  return df
The node contains several parameters:
- func: A function that corresponds to the node logic.
- inputs: The name or the list of the names of variables used as inputs to the function. We can put the catalog name that we defined on catalog.yml here.
- outputs: The name or the list of the names of variables used as outputs to the function. We can put the catalog name that we defined on catalog.yml here.
- name: Optional node name to be used when displaying the node in logs or any other visualisations.
- tags: Optional set of tags to be applied to the node.
In this example, we would then need to create 2 nodes:
import pandas as pd
import numpy as np
from kedro.pipeline import node


def calculate_height(df):
    df["height"] = np.sqrt(df["weight"] / df["bmi"])
    return df


def calculate_avg_by_gender(df):
    df = df.groupby('gender').mean()
    return df

nodes = [
    node(
        func=calculate_height,
        inputs="freshman_bmi",
        outputs="freshman_with_height",
        name="calculate_height",
    ),
    node(
        func=calculate_avg_by_gender,
        inputs="freshman_with_height",
        outputs="freshman_bmi_summary",
        name="calculate_avg_by_gender",
    ),
]
As we can see the first node, named calculate_height, take freshman_bmi as the input of the function, and save the outputs to freshman_with_height.
Both freshman_bmi and freshman_with_height are defined in the catalog.yml as CSV file with their file path, so the function will read/write the data based on the types & file paths defined.
The second node gets the input from the output of the first node, then save it as CSV to freshman_bmi_summary as defined on catalog.yml.
Pipeline
A pipeline organizes the dependencies and execution order of your collection of nodes and connects inputs and outputs while keeping your code modular.
The pipeline determines the node execution order by resolving dependencies and does not necessarily run the nodes in the order in which they are passed in. The pipeline contains one or more nodes.
In this example, we can leverage the above code to create a pipeline as follows:
import pandas as pd
import numpy as np
from kedro.pipeline import node
from kedro.pipeline import Pipeline


def calculate_height(df):
    df["height"] = np.sqrt(df["weight"] / df["bmi"])
    return df


def calculate_avg_by_gender(df):
    df = df.groupby('gender').mean()
    return df

pipeline = Pipeline(
  [
      node(
          func=calculate_height,
          inputs="freshman_bmi",
          outputs="freshman_with_height",
          name="calculate_height",
      ),
      node(
          func=calculate_avg_by_gender,
          inputs="freshman_with_height",
          outputs="freshman_bmi_summary",
          name="calculate_avg_by_gender",
      ),
  ],
  tags="bmi_pipeline",
)
As for the best practices, usually, we split the pipeline and nodes into different python files, so we will have nodes.py and pipeline.py under src/bmi/pipelines/ folder:
import pandas as pd
import numpy as np


def calculate_height(df):
    df["height"] = np.sqrt(df["weight"] / df["bmi"])
    return df


def calculate_avg_by_gender(df):
    df = df.groupby('gender').mean()
    return df
from kedro.pipeline import Pipeline, node

from src.bmi.pipelines.nodes import (
    calculate_height,
    calculate_avg_by_gender,
)


def create_pipeline():

    return Pipeline(
        [
            node(
                func=calculate_height,
                inputs="freshman_bmi",
                outputs="freshman_with_height",
                name="calculate_height",
            ),
            node(
                func=calculate_avg_by_gender,
                inputs="freshman_with_height",
                outputs="freshman_bmi_summary",
                name="calculate_avg_by_gender",
            ),
        ],
        tags="bmi_pipeline",
    )
There are two kinds of pipelines: the main pipeline, and the sub-pipeline. The one that we create above is the sub-pipeline. The main pipeline combines all the sub-pipelines in the project. The main pipeline file is automatically generated when we create a new kedro project. In this example, the main pipeline should be available at src/bmi/pipeline.py.
We need to “register” the sub-pipelines that we created, by importing the pipelines and call create_pipeline() function in the main pipeline file, as follows:
"""Construction of the master pipeline.
"""

from typing import Dict

from kedro.pipeline import Pipeline

from src.bmi.pipelines import pipeline as bmi


def create_pipelines(**kwargs) -> Dict[str, Pipeline]:
    """Create the project's pipeline.
    Args:
        kwargs: Ignore any additional arguments added in the future.
    Returns:
        A mapping from a pipeline name to a ``Pipeline`` object.
    """
    bmi_pipeline = bmi.create_pipeline()

    return {
        "__default__": bmi_pipeline,
        "bmi_pipeline": bmi_pipeline,
    }
Executing Kedro Command
After we create a pipeline, we can use kedro run command to run the whole pipeline:
$ kedro run --env bmi --pipeline bmi_pipeline
2021-01-15 17:06:03,333 - kedro.io.data_catalog - INFO - Loading data from `freshman_bmi` (CSVDataSet)...
2021-01-15 17:06:03,344 - kedro.pipeline.node - INFO - Running node: calculate_height: calculate_height([freshman_bmi]) -> [freshman_with_height]
2021-01-15 17:06:03,365 - numexpr.utils - INFO - NumExpr defaulting to 4 threads.
2021-01-15 17:06:03,374 - kedro.io.data_catalog - INFO - Saving data to `freshman_with_height` (CSVDataSet)...
2021-01-15 17:06:03,390 - kedro.runner.sequential_runner - INFO - Completed 1 out of 2 tasks
2021-01-15 17:06:03,391 - kedro.io.data_catalog - INFO - Loading data from `freshman_with_height` (CSVDataSet)...
2021-01-15 17:06:03,398 - kedro.pipeline.node - INFO - Running node: calculate_avg_by_gender: calculate_avg_by_gender([freshman_with_height]) -> [freshman_bmi_summary]
2021-01-15 17:06:03,409 - kedro.io.data_catalog - INFO - Saving data to `freshman_bmi_summary` (CSVDataSet)...
2021-01-15 17:06:03,417 - kedro.runner.sequential_runner - INFO - Completed 2 out of 2 tasks
2021-01-15 17:06:03,418 - kedro.runner.sequential_runner - INFO - Pipeline execution completed successfully.
The --env defines which configurations that we use. Since we put our catalog on conf/bmi folder, then we pass bmi as the value. We also specify the pipeline name in the --pipeline argument.
Another thing worth mentioning: we run the pipeline which contains two nodes and generates two CSV files in less than a second!
Apart from the pipeline, we can also use --node and --tag:
$ kedro run --env bmi --node calculate_height

2021-01-15 17:17:12,367 - kedro.io.data_catalog - INFO - Loading data from `freshman_bmi` (CSVDataSet)...
2021-01-15 17:17:12,375 - kedro.pipeline.node - INFO - Running node: calculate_height: calculate_height([freshman_bmi]) -> [freshman_with_height]
2021-01-15 17:17:12,399 - numexpr.utils - INFO - NumExpr defaulting to 4 threads.
2021-01-15 17:17:12,404 - kedro.io.data_catalog - INFO - Saving data to `freshman_with_height` (CSVDataSet)...
2021-01-15 17:17:12,419 - kedro.runner.sequential_runner - INFO - Completed 1 out of 1 tasks
2021-01-15 17:17:12,420 - kedro.runner.sequential_runner - INFO - Pipeline execution completed successfully.

$ kedro run --env bmi --tag bmi_pipeline

2021-01-15 17:18:37,251 - kedro.io.data_catalog - INFO - Loading data from `freshman_bmi` (CSVDataSet)...
2021-01-15 17:18:37,257 - kedro.pipeline.node - INFO - Running node: calculate_height: calculate_height([freshman_bmi]) -> [freshman_with_height]
2021-01-15 17:18:37,277 - numexpr.utils - INFO - NumExpr defaulting to 4 threads.
2021-01-15 17:18:37,285 - kedro.io.data_catalog - INFO - Saving data to `freshman_with_height` (CSVDataSet)...
2021-01-15 17:18:37,307 - kedro.runner.sequential_runner - INFO - Completed 1 out of 2 tasks
2021-01-15 17:18:37,308 - kedro.io.data_catalog - INFO - Loading data from `freshman_with_height` (CSVDataSet)...
2021-01-15 17:18:37,315 - kedro.pipeline.node - INFO - Running node: calculate_avg_by_gender: calculate_avg_by_gender([freshman_with_height]) -> [freshman_bmi_summary]
2021-01-15 17:18:37,324 - kedro.io.data_catalog - INFO - Saving data to `freshman_bmi_summary` (CSVDataSet)...
2021-01-15 17:18:37,333 - kedro.runner.sequential_runner - INFO - Completed 2 out of 2 tasks
2021-01-15 17:18:37,334 - kedro.runner.sequential_runner - INFO - Pipeline execution completed successfully.
Kedro Viz
Another cool feature of kedro is Kedro-Viz. It shows you how your data pipelines are structured. With Kedro-Viz you can:
- See how your datasets and Python functions (nodes) are resolved in Kedro so that you can understand how your data pipeline is built
- Get a clear picture when you have lots of datasets and nodes by using tags to visualise sub-pipelines
- Search for nodes and datasets
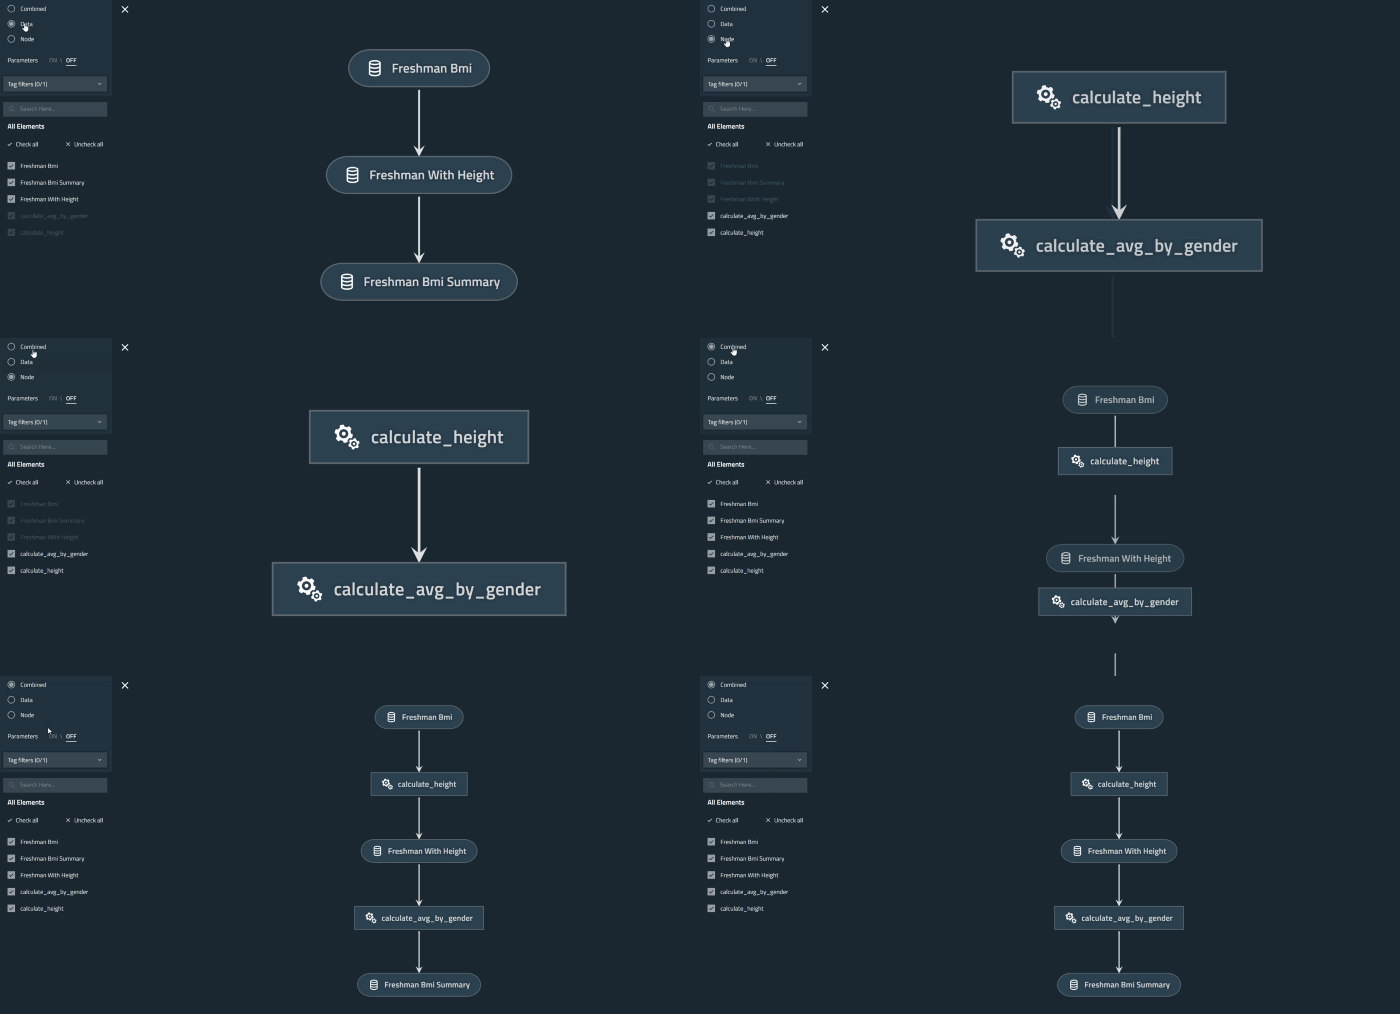
This is how our BMI data pipeline looks like, as we can see clearly on the viz, we have three Data Catalog/Definition, and two Nodes. We can also see the connection between the data catalog & nodes:

Kedro In Telkomsel
We heavily use kedro in several data-related projects within Telkomsel. We use kedro in our production environment which consumes tens of TBs of data, runs hundreds of feature engineering tasks, and serves dozens of Machine Learning models.
We have been using kedro for more than a year now and things are going smoothly. Some of the benefits we get by using kedro, including:
- The collaboration between the Data Engineering and Data Science team has never been this smooth
- Have a single source of truth of data sources & sinks, feature logic, and configurations
- Ability to run complex end-to-end data pipeline with just a few commands
- Fancy data pipeline visualization helps us a lot when debugging and explaining the pipeline to the business user
- High-quality data science scripts assured by unit tests & integration tests
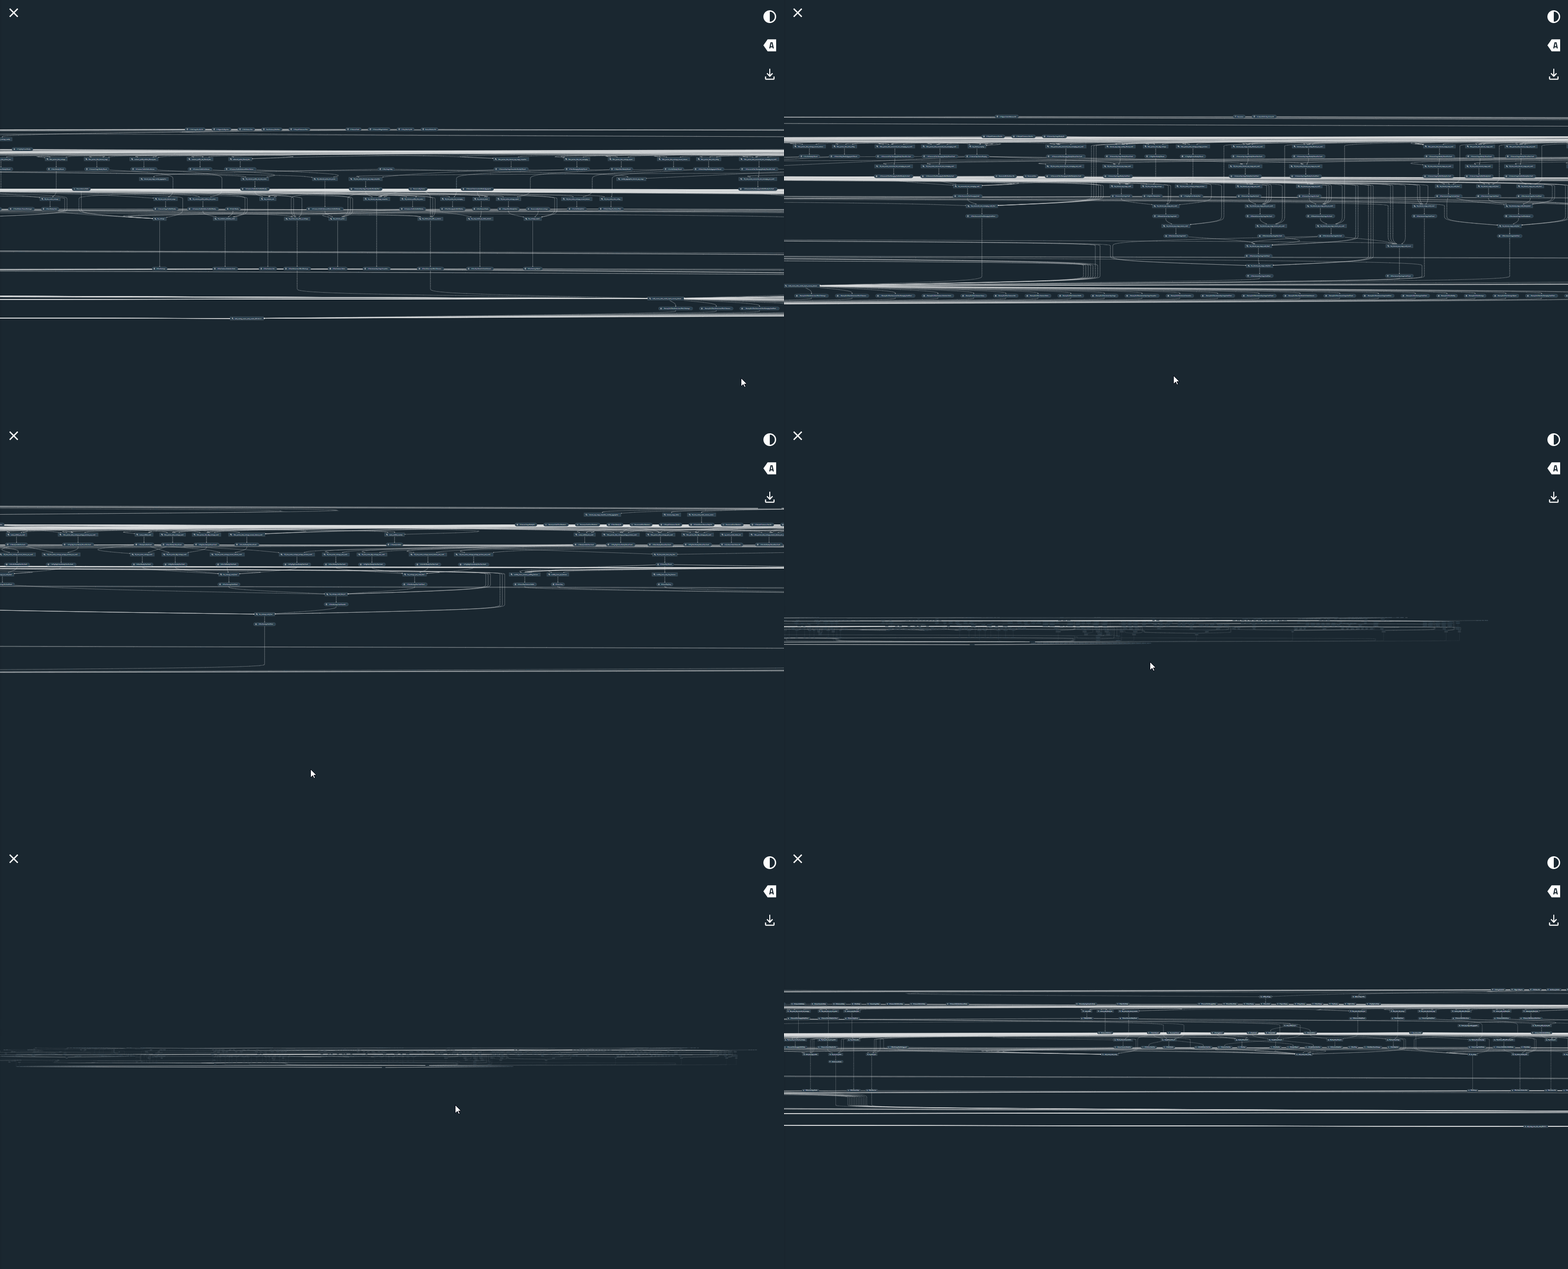
If you are wondering, here is one of our kedro data pipeline looks like:

(the original article was published in Life At Telkomsel titled How We Build a Production-Grade Data Pipeline)

